


- Sign up for multiple social media accounts and post the right content
Such as Facebook , Instagram , Twitter , Pinterest , The Knot and WeddingWire
While your Facebook fans may want to read your wedding planning tips, Pinterest and Instagram followers probably just want to view your photos. Create content specifically for each social media platform. Find your most active fans, pay attention to the types of content that gets them engaged, and use this information to dictate what you post.
2. Update Your Content Often
The more social media accounts you have, the more likely it is that you will show up in a Google search. Besides posting fresh content on Twitter and Facebook, you should also update your website content every week or so. Remember, Google likes to see fresh content, and you want Google to like you!
3. Promote Your Sales and Upcoming Events
Brides love to hear about a great deal! Most brides have a specific budget in mind, so displaying your great deals and specials via social media would be a great attention grabber!
4. Showcase Your Products
Brides look to Pinterest for inspiration. Needless to say, using social media helps you increase sales. By sharing information about your business, you are providing a virtual visual aid that brides, grooms, and their families can choose from.
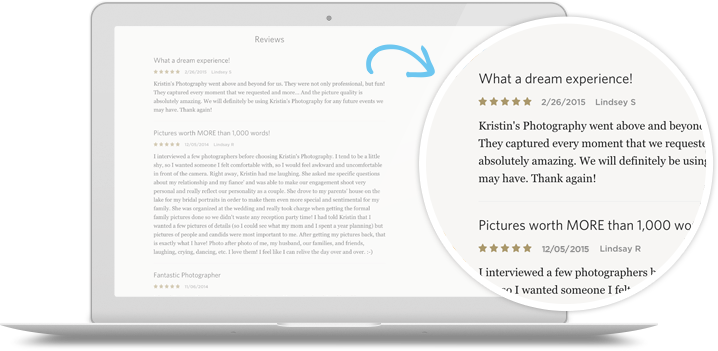
5. Reviews, Reviews, Reviews!
Customer feedback is key! It is very important that your customers know you value their opinion. Brides to be often look to WeddingWire and TheKnot for past client reviews to base their opinions on, Facebook also offers a review feature.
How to setup Facebook Reviews:
Any admin of a Page can enable reviews under the Page settings. You can follow the steps below to guide you through the process.
1. Click Settings above your Page’s cover photo.
2. Click Reviews in the right column.
3. Click on Edit option
4. Select ‘Allow’ or ‘Disable reviews’
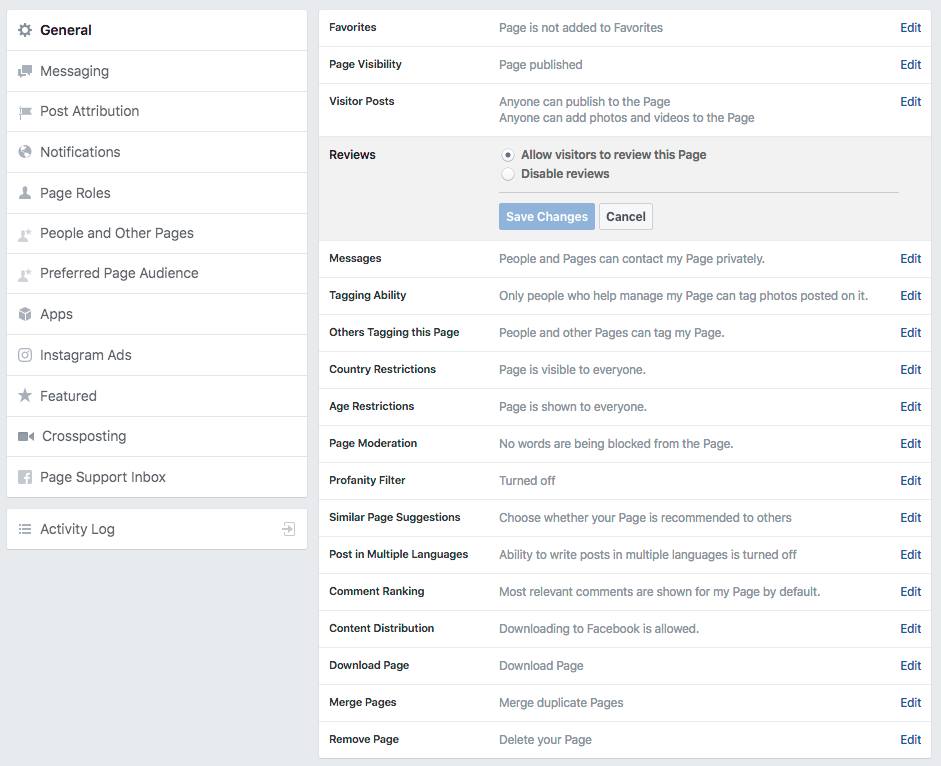
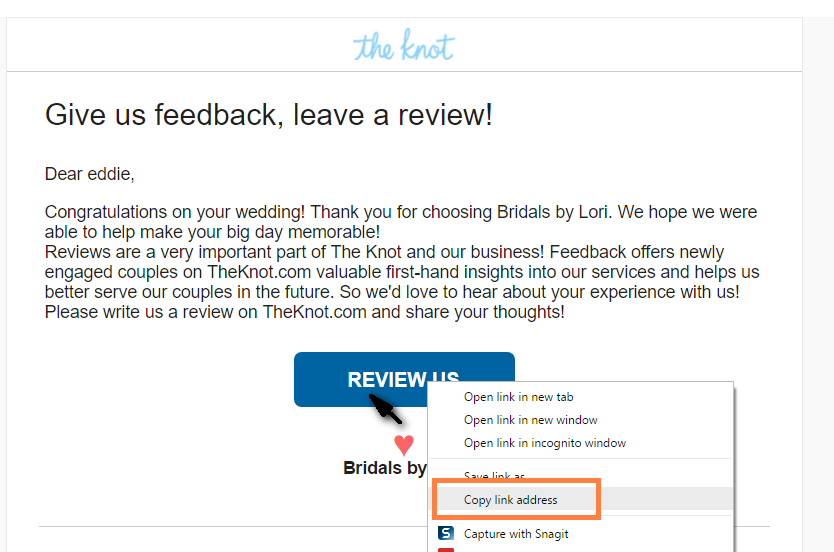
To create a direct link to your reviews which can be added to an email marketing piece, simply add a link such as : https://www.facebook.com/YOURUSERNAME/reviews/
Sign up with The Knot!
The Knot Reviews FAQ
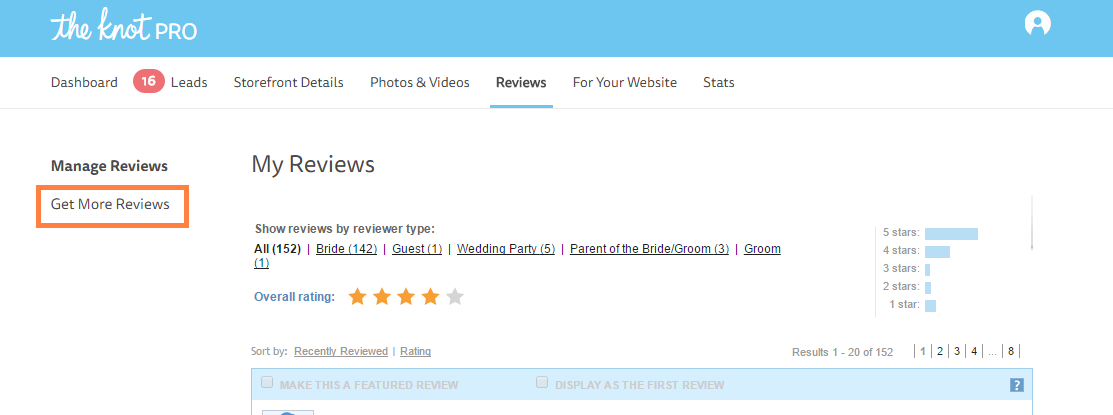
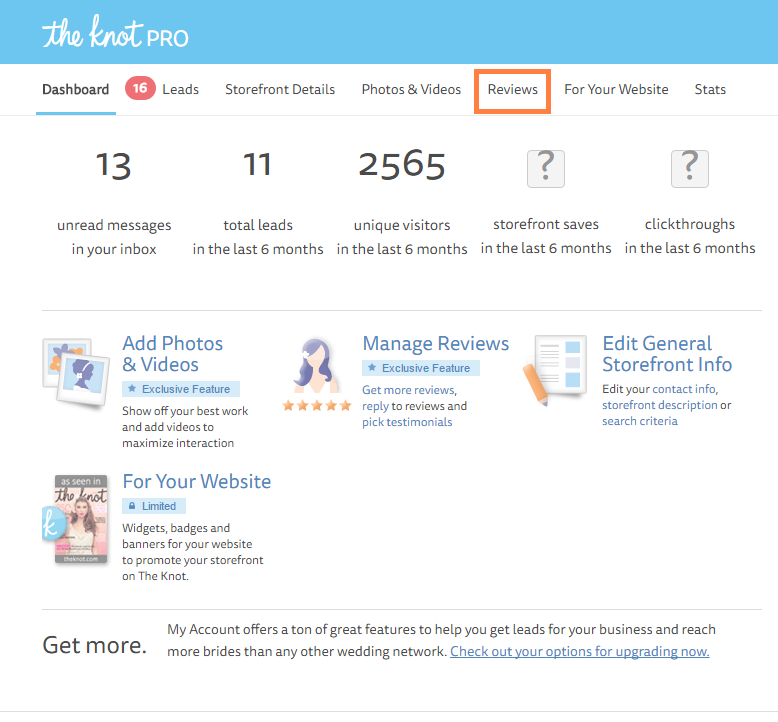
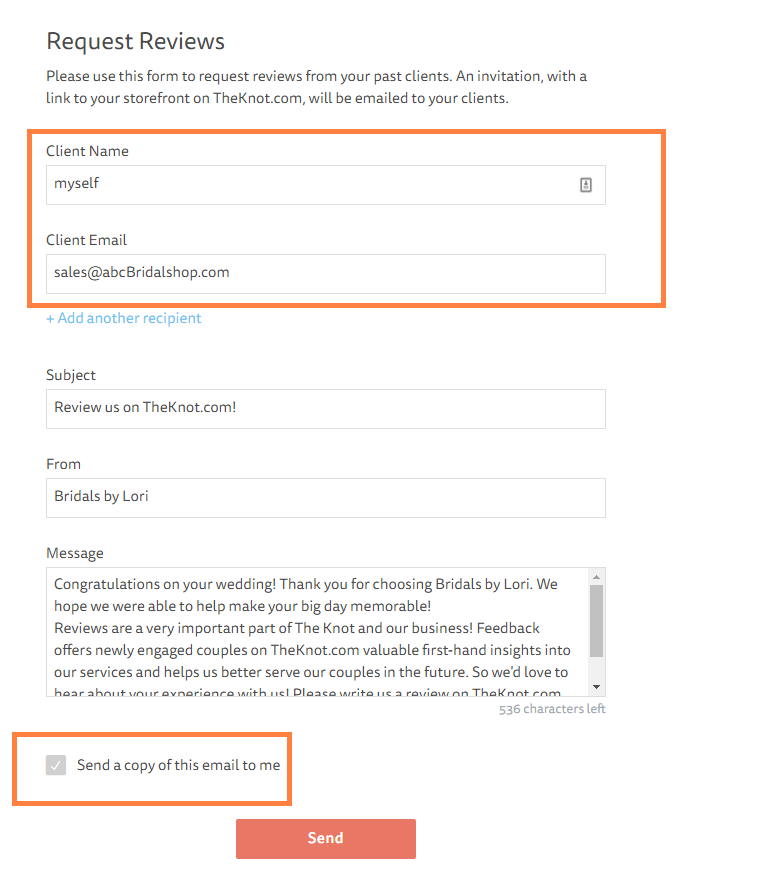
How to setup Reviews:
How do I request reviews?
Click on the “Reviews” tab, then click “Get More Reviews” – here, you can enter your customers name and email address to send a review request directly through My Account. You can also email this to yourself and send the message through your personal email account.
How to setup Google Reviews:
Create a link for customers to write reviews
Create a link that customers can click to leave a review of your business on Google. You can easily share the link with customers to encourage them to write reviews and rate your business.
To create a link, you’ll need to get the Place ID for your business. To get your Place ID:
- Go to the Google Places API.
- Enter your business information in the “Enter a location” field at the top of the map.
- Click your business name in the list that appears.
- Your Place ID will appear on the map, beneath your business name.
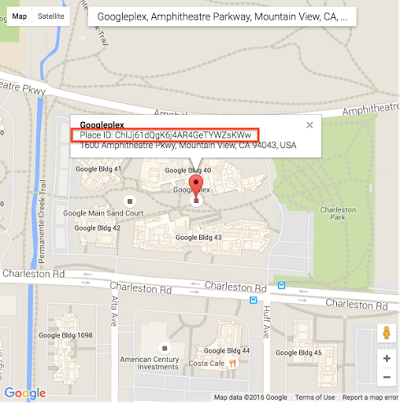
- Add your Place ID to the following URL to create your link:
- https://search.google.com/local/writereview?placeid=<place_id>
Using the example above, the URL with the Place ID added would be:
- https://search.google.com/local/writereview?placeid=ChIJj61dQgK6j4AR4GeTYWZsKWw
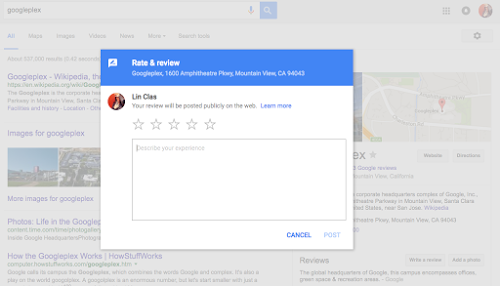
Tip: Make it easier for your users to leave a review by shortening the URL. Learn more
When customers click your link, a window will open in their browser. They’ll be able to rate your business and leave a review. Learn how to read and reply to customer reviews
 Keep in mind that it’s against the Google My Business review policy to solicit reviews from customers by offering incentives or setting up review stations at your place of business. Reviews that violate the policy may be removed.
Information Credit: http://www.bookmorebrides.com/8-tips-social-media-marketing-pro/